Submit Notebook jobs with jupyter-scheduler
warning
This is a new feature still in beta so please leave some feedback and report any issues.
There is one known issue with the Update Job Definition and Resume job definition which is related to Nebari-Workflow-Controller issue #18. The current workaround for those who need to update (or pause) your job definitions, is simply to delete the current job definition and create a new one as and when needed.
Some Nebari users require scheduling notebook runs. This is now achievable with Jupyter-Scheduler, a JupyterLab extension that has been enhanced and integrated into Nebari. Additionally, users can monitor their job status by accessing the <nebari-domain>/argo endpoint.
Notebook jobs are useful in situations where you need no human interaction in the notebook and the results can be efficiently saved to your home directory, the cloud, or other storage locations. It is also useful in situations where the notebook might run for a long time and the user needs to shut down their JupyterLab server.
info
Shutting down your JupyterLab server (and associated JupyterLab extensions) doesn't stop your running Jupyter-Scheduler jobs because the Nebari team extended Jupyter-Scheduler to use Argo-Workflows as it's backend. Details can be found in the argo-jupyter-scheduler repo.
Jupyter-Scheduler is included by default in the base Nebari JupyterLab image and can be used with any conda-store environment available to the notebook author (papermill must be included in the environment).
note
By default, only users in the admin or developer groups will have permission to create notebook jobs. For more information regarding users and groups, please visit How to configure Keycloak
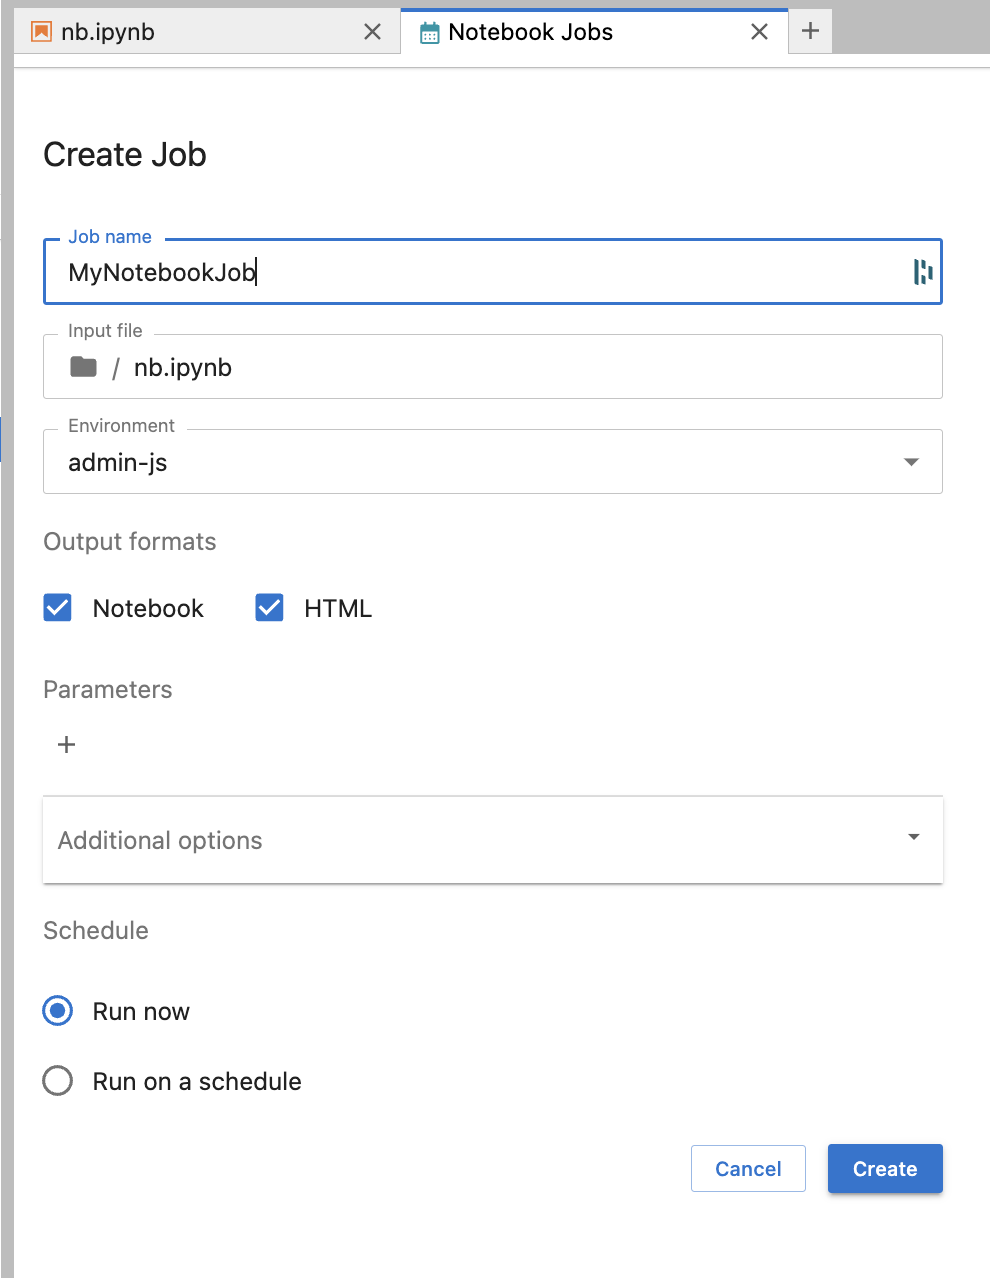
Submitting a Notebook as a Jupyter-Scheduler Job
To submit your job, simply click the Jupyter-Scheduler icon on the top of your notebook toolbar.
![]()
This will open a new Create Job tab. Fill out the form and click "Create" to create a schedule.
note
Include papermill in your conda-store environment.
Once created, the status of the job and the notebook output can be viewed from the Jupyter-Scheduler Notebook Jobs UI:
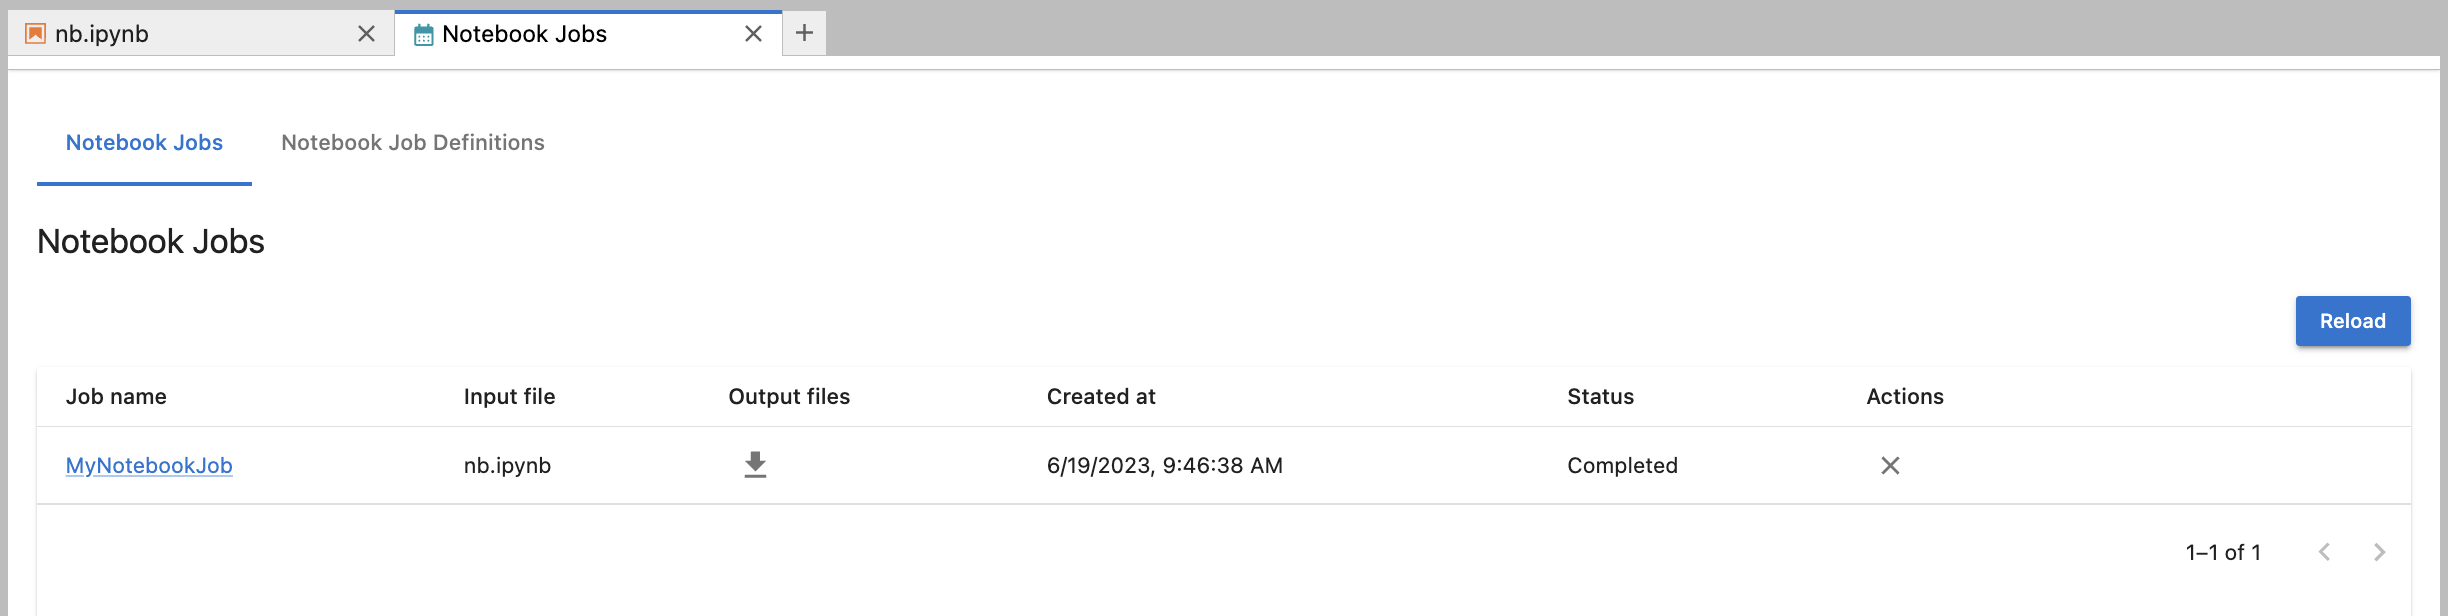
The output of your job will be accessible via the download icon in the "Output files" column. After you download the output, new links will replace the icon and point to the location of the downloaded output.
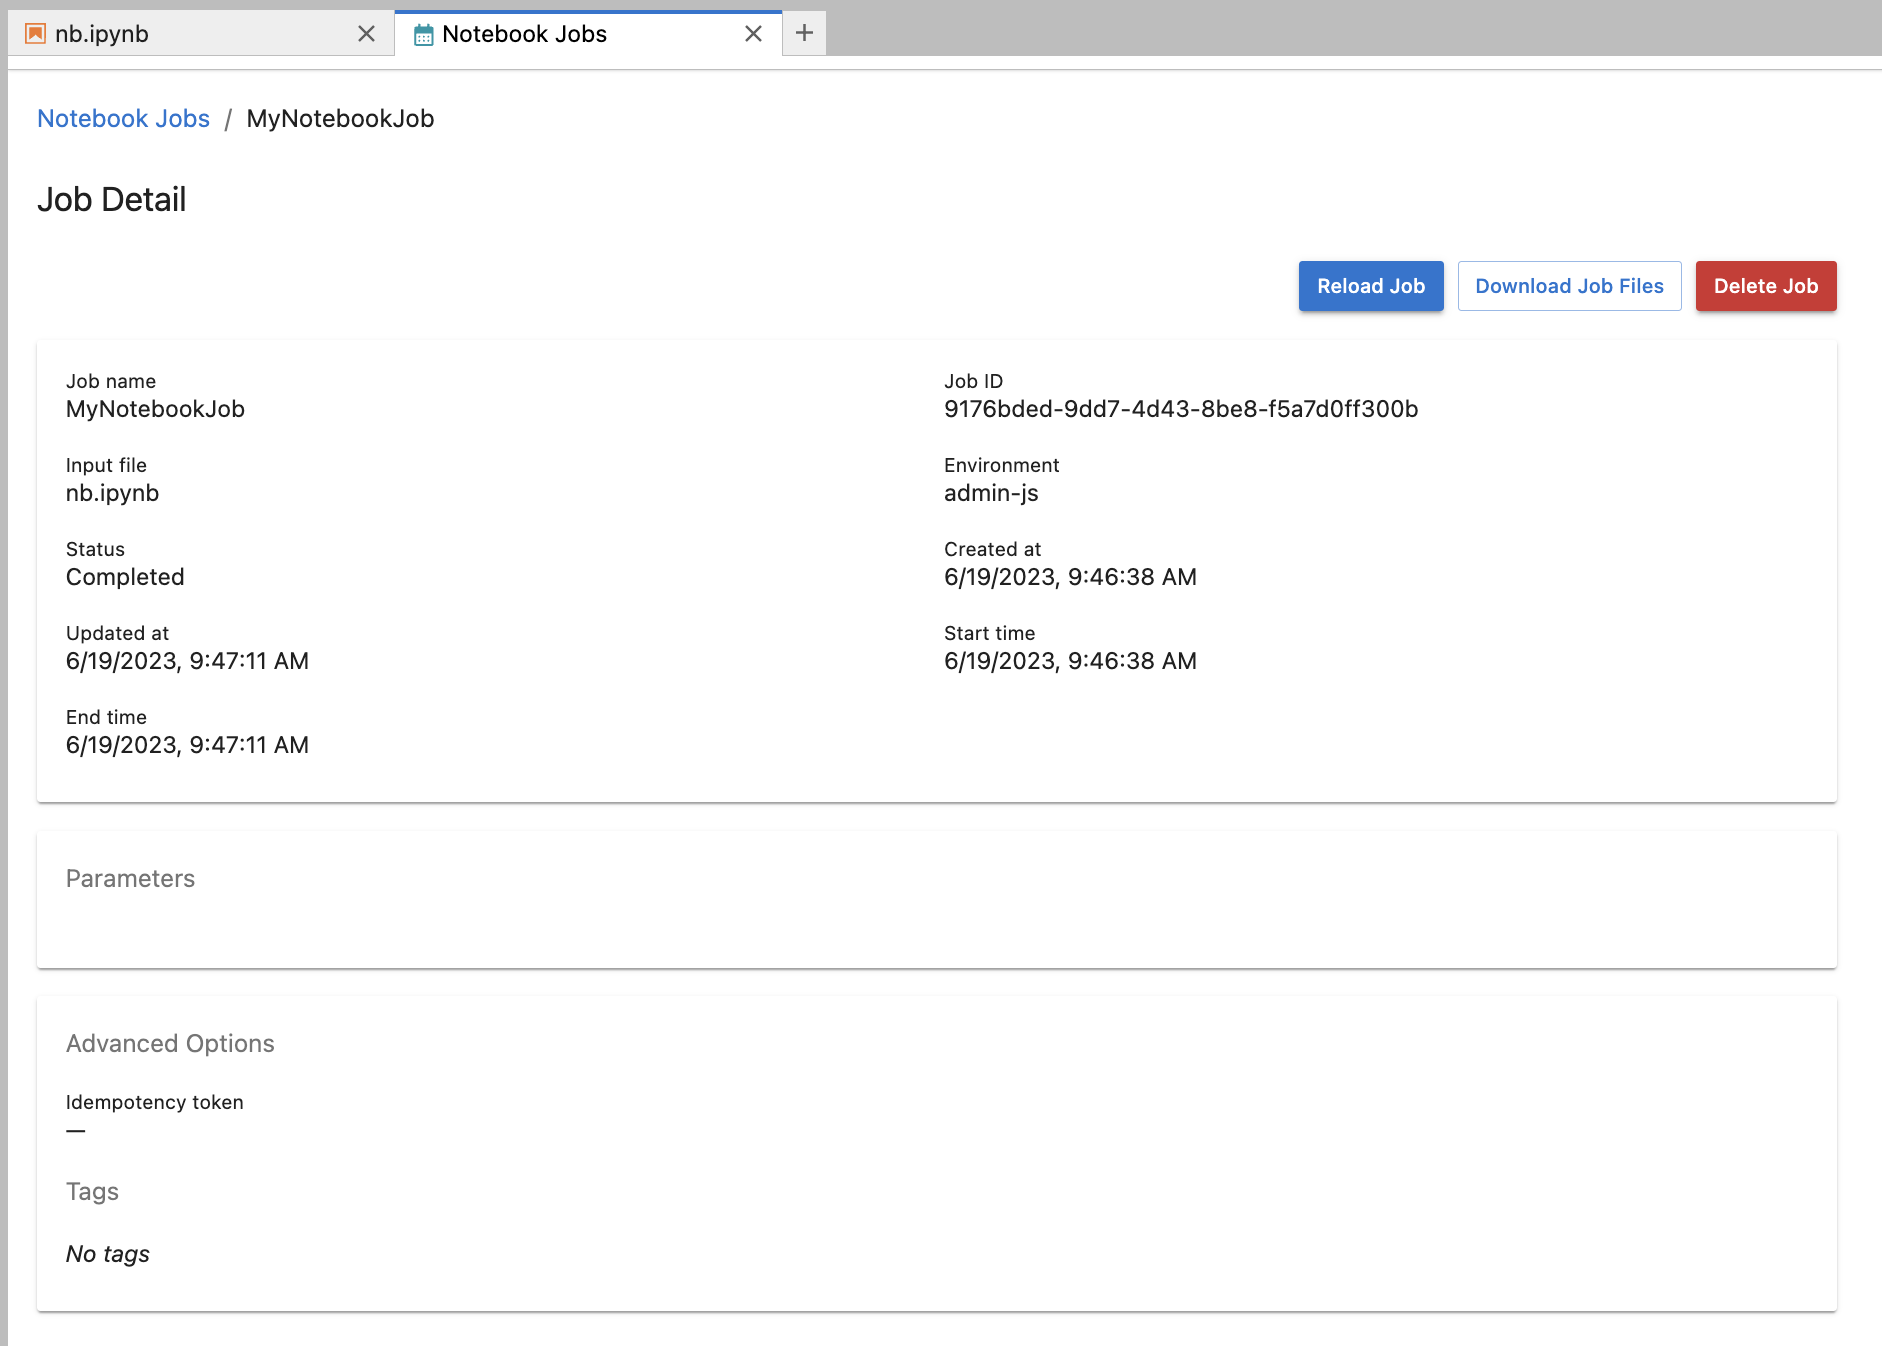
Click on the notebook job name to view more information about the job.
If you need to reopen the Notebook Jobs tab, look for the icon in the upper right of the JupyterLab launcher tab.
![]()
info
As mentioned above, the notebook job will run as an Argo-Workflows workflow. This means the jobs (workflows) are also viewable from the Argo-Workflows UI at <nebari-domain>/argo. The name of the workflow is prefixed with job-<job-id>, which will match the notebook job ID.

All associated workflows have a TTL (time-to-live) set to 600 seconds. This means that regardless of whether or not your workflow was successful, it will be deleted after 10 mins from the Argo UI. The downside is that those logs are now gone. However, the upside is that deleted workflows no longer consume compute resources.
Submit Jupyter Notebooks to run on a schedule
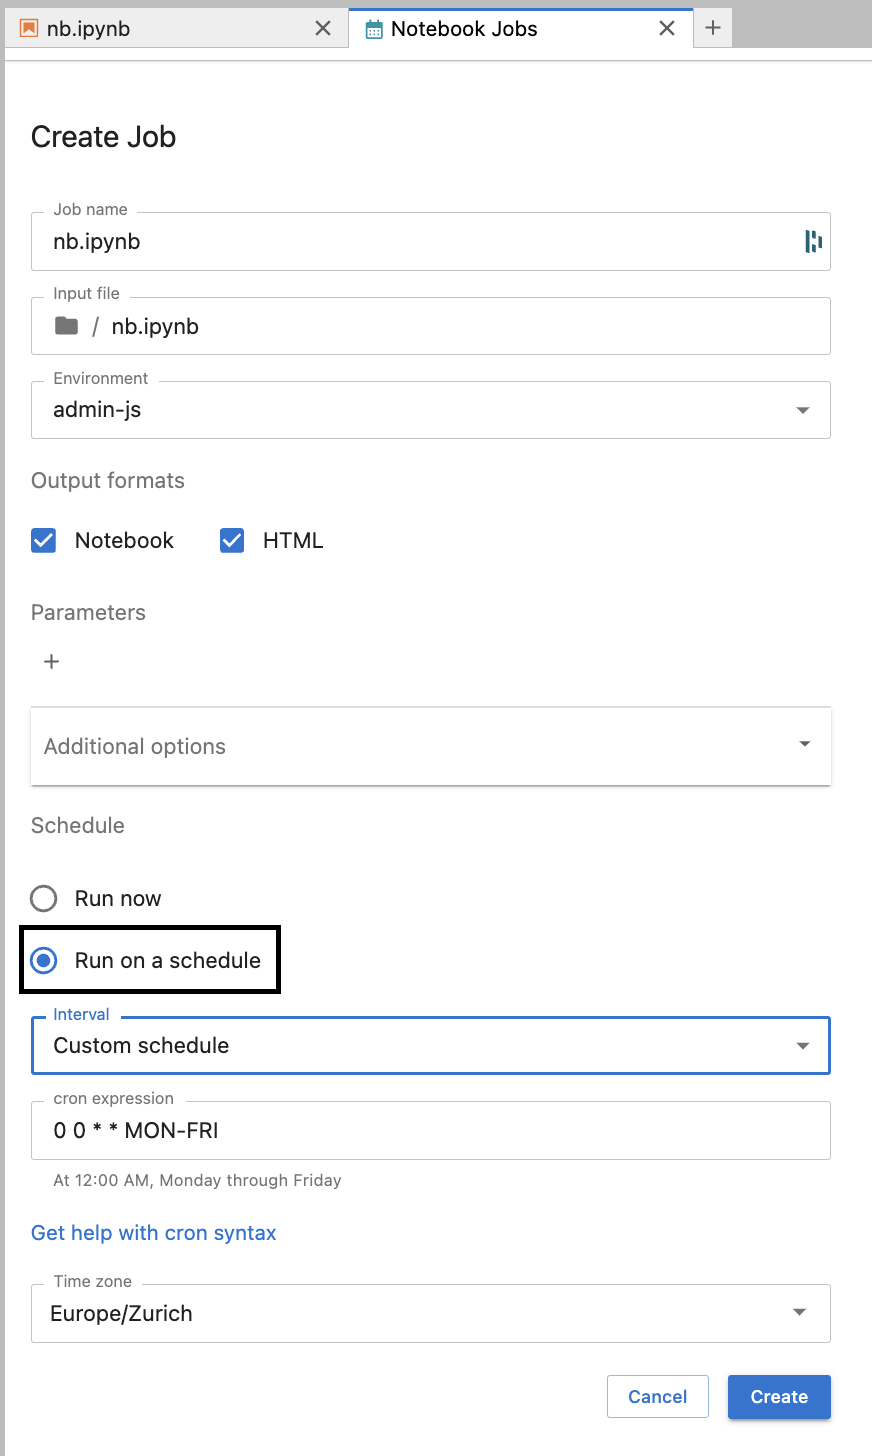
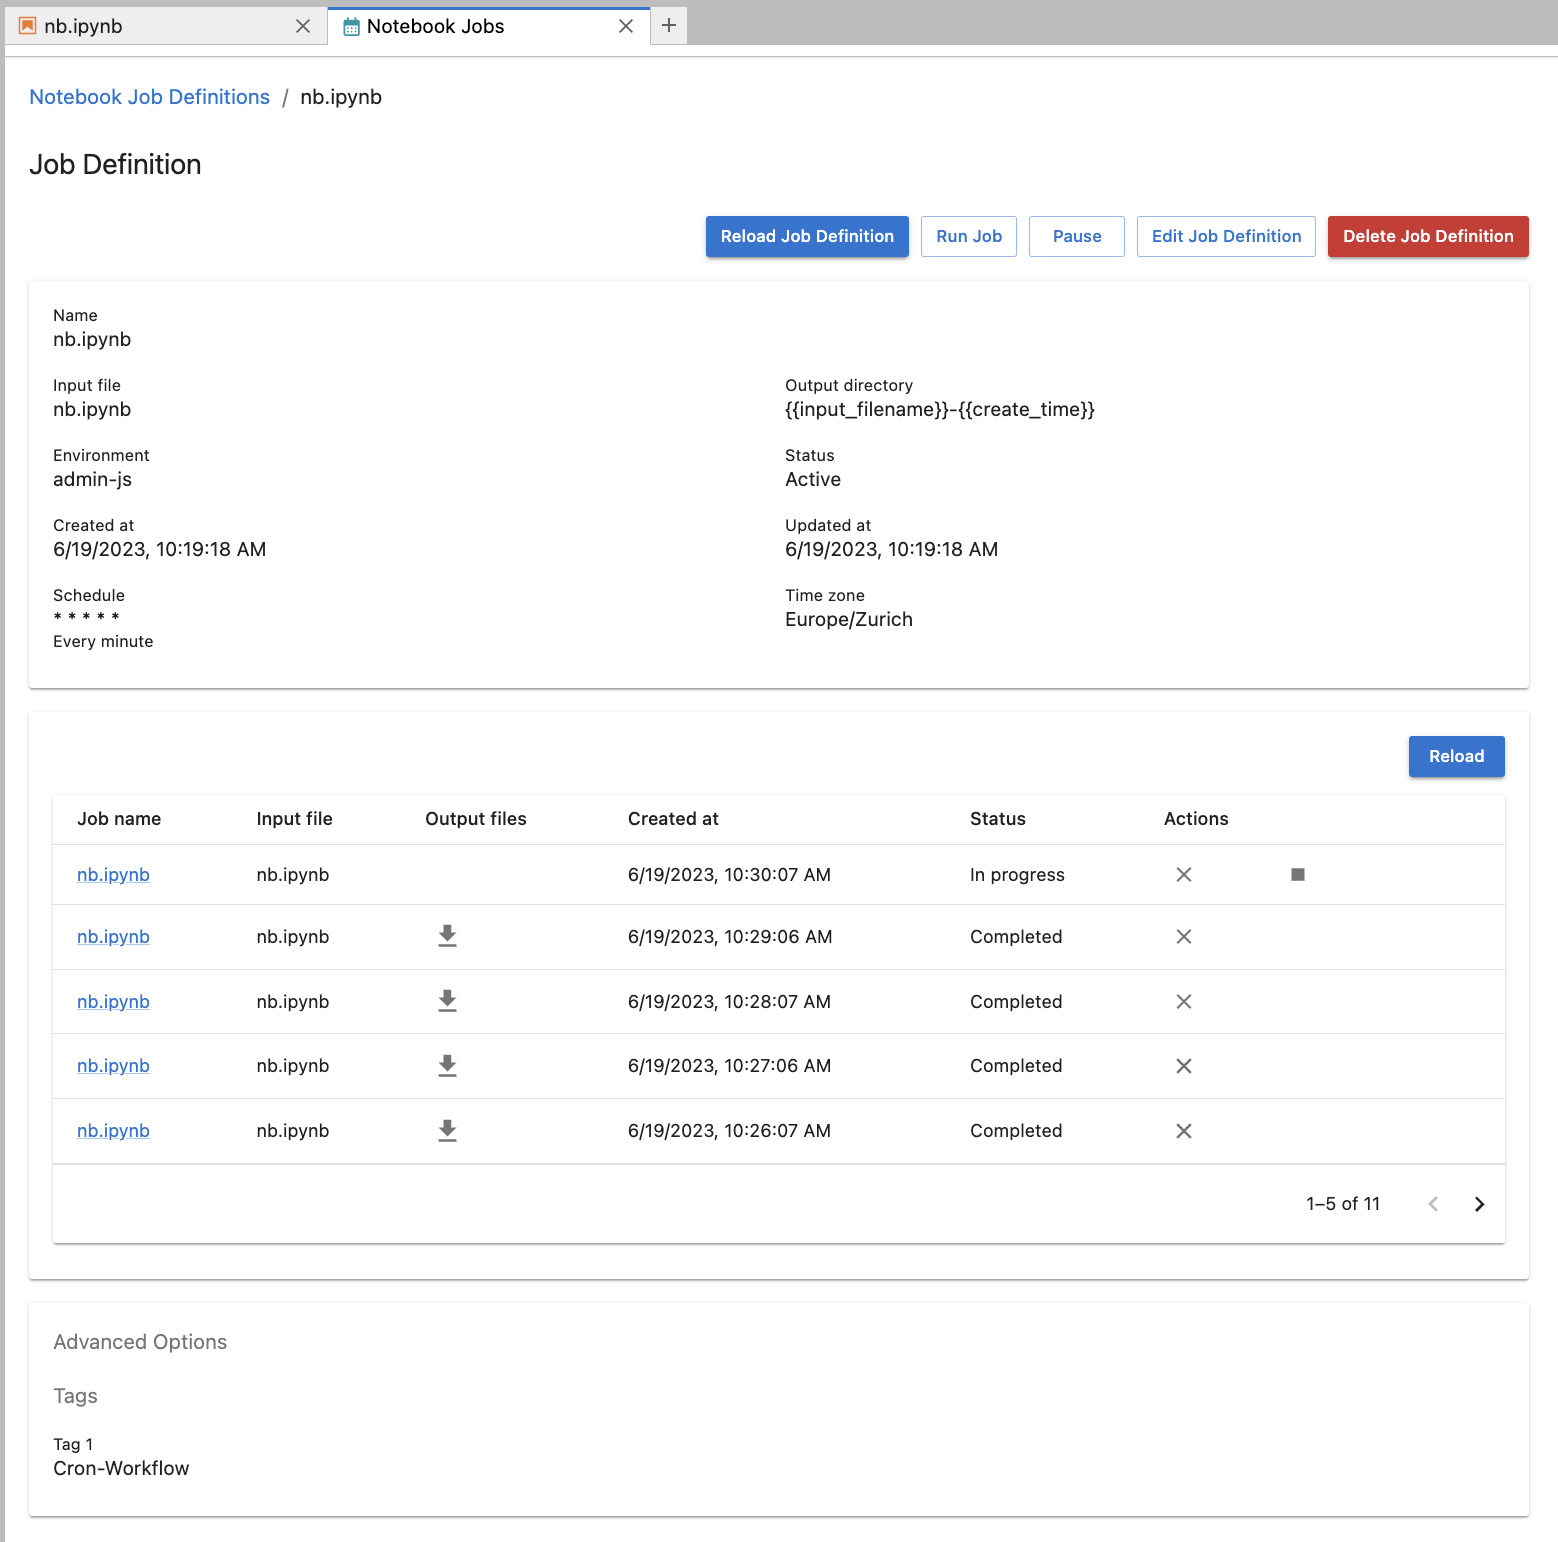
The other way notebooks can be run is on a specified schedule, Jupyter-Scheduler refers to these as "Job Definitions". After selecting the Jupyter-Scheduler icon at the top of the notebook, select "Run on a schedule" and then define the schedule. There is also an option to specify the time zone.
tip
You can use crontab.guru, which is a nifty tool that tries to translate the schedule syntax into plain English.
When a job definition is created, a new job is created at each time interval specified by the schedule. These jobs can be inspected by clicking on "Notebook Job Definitions" near the top of the Jupyter-Scheduler UI. From here you have several options, including:
- Delete the job definition
- Pause the job job definition
- view details such as the Status of the job definition
- view the list of notebook jobs created from this job definition
- view the Tags (by default all job definitions are tagged with
Cron-Workflow)
info
Unlike a regular notebook job, job definitions create Argo-Workflows cron-workflows (workflows that run on a schedule). This cron-workflow in turn creates workflows at each time interval specified by the schedule. Another difference is that the workflow names are prefixed with job-def-<job-definition-id>.

warning
Notebook jobs that run on a schedule will run indefinitely so it's the responsibility of the job creator to either delete or pause the job if then they are no longer needed.
Debugging failed jobs
Even if your notebook runs normally in JupyterLab, it might fail during a scheduled run.
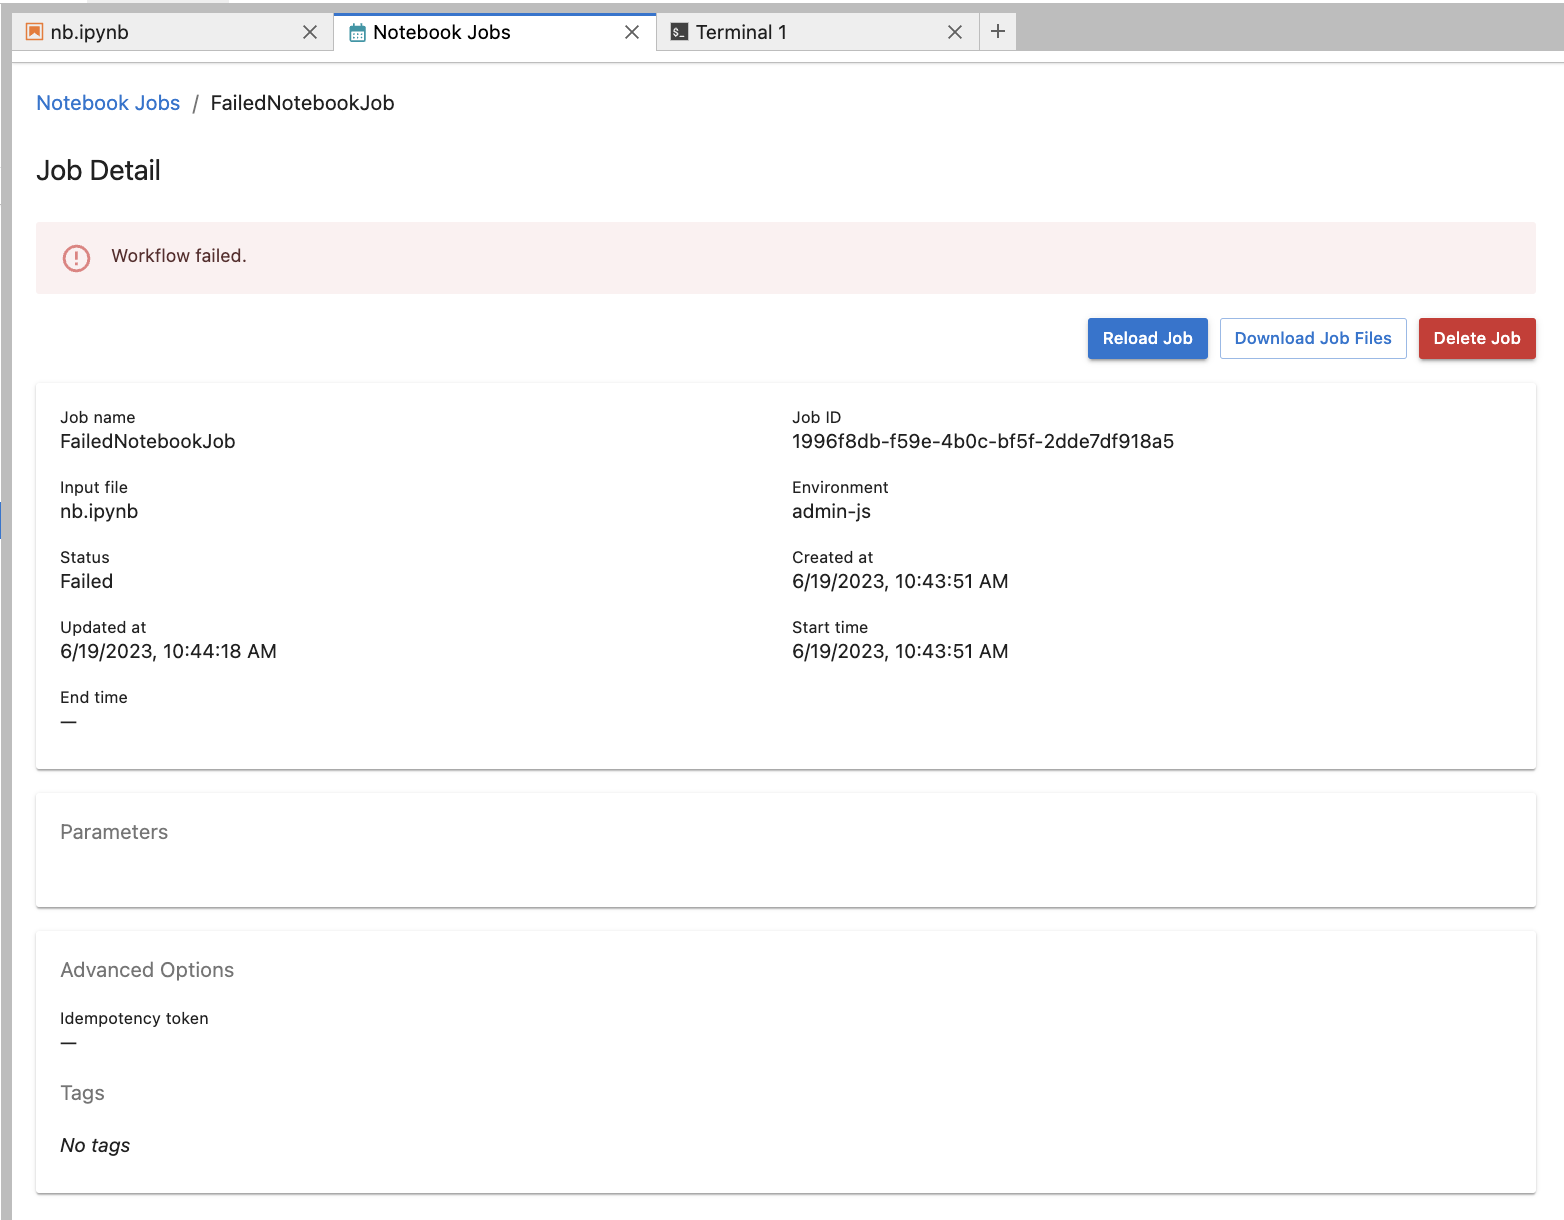
You can view the job log and the notebook using either the terminal or the file browser (go to the JupyterLab View menu and enable "Show Hidden Files"). These are the steps to get the logs:
- Find the job ID of your failed job
- Launch a terminal session or go to your file browser
- Navigate to
~/.local/share/jupyter/scheduler_staging_area - Find the folder that corresponds to the job ID
- Open (or
cat) any log file or notebook files and look for error information
info
Notebook job details can also be viewed from the <nebari-domain>/argo UI if the job is still listed.
Lastly, if the job fails without writing to the scheduler_staging_area, or the job status is stuck in In progress mode for an extended period of time, have an administrator try and view the specific logs on your JupyterLab server pod or on the workflow pod itself.