Fine Grained Permissions via Keycloak
Nebari provides its users (particularly admins) a way to manage roles and permissions to
various services like jupyterhub and conda-store via Keycloak. The idea is to be able to manage
roles and permissions from a central place, in this case Keycloak. An admin or anyone who has
permissions to create a role in Keycloak will create role(s) with assigned scopes (permissions)
to it and attach it to user(s) or group(s).
These roles are created and attached from keycloak's interface and scoped for a particular
client (i.e. a Nebari service such as jupyterhub or conda-store). This means the roles for a
particular service (say jupyterhub) should be created within the Keycloak client named
jupyterhub.
By default, Nebari comes with several custom clients included in a fresh deployment. These clients facilitate various services and integrations within the Nebari ecosystem. The predefined clients are as follows:
clients:
  - jupyterhub
  - conda_store
  - grafana (if monitoring is enabled)
  - argo-server-sso (if argo is enabled)
  - forwardauth
To manage and configure these clients, you can navigate to the Clients tab within the
Keycloak admin console, as illustrated in the image below.
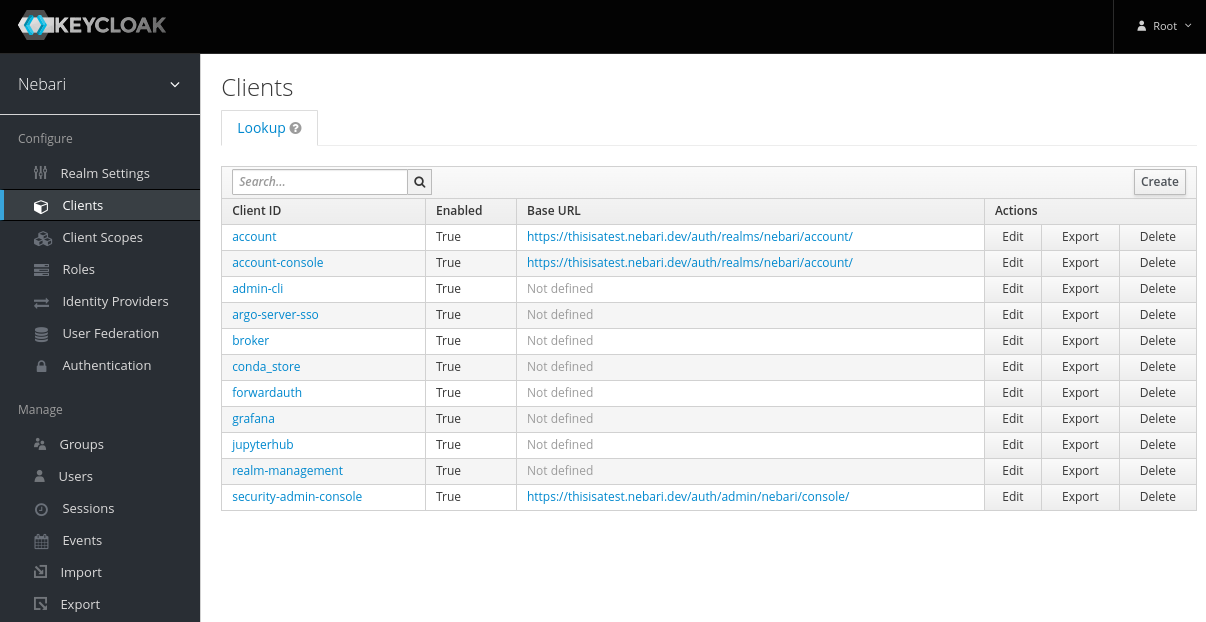
This can be accessed at <nebari-url>/auth/admin/master/console/#/realms/nebari/clients
Creating a Role
The process for creating a role is similar, irrespective of the service. To create a role for a service
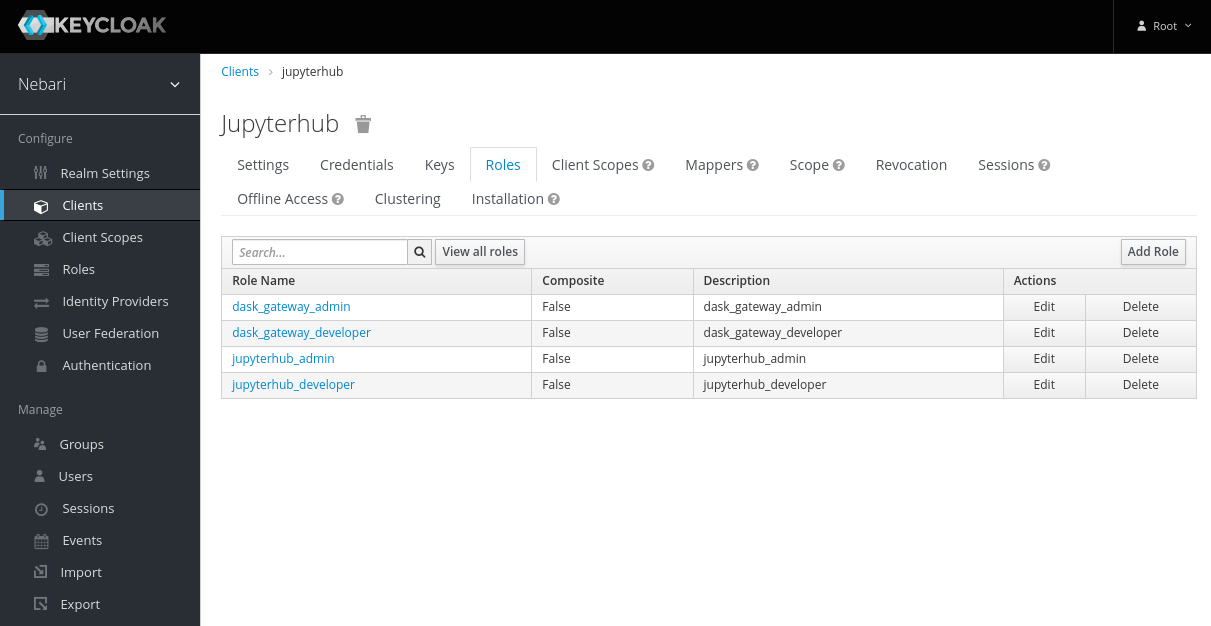
- Select the appropriate client and click on "Add Role".
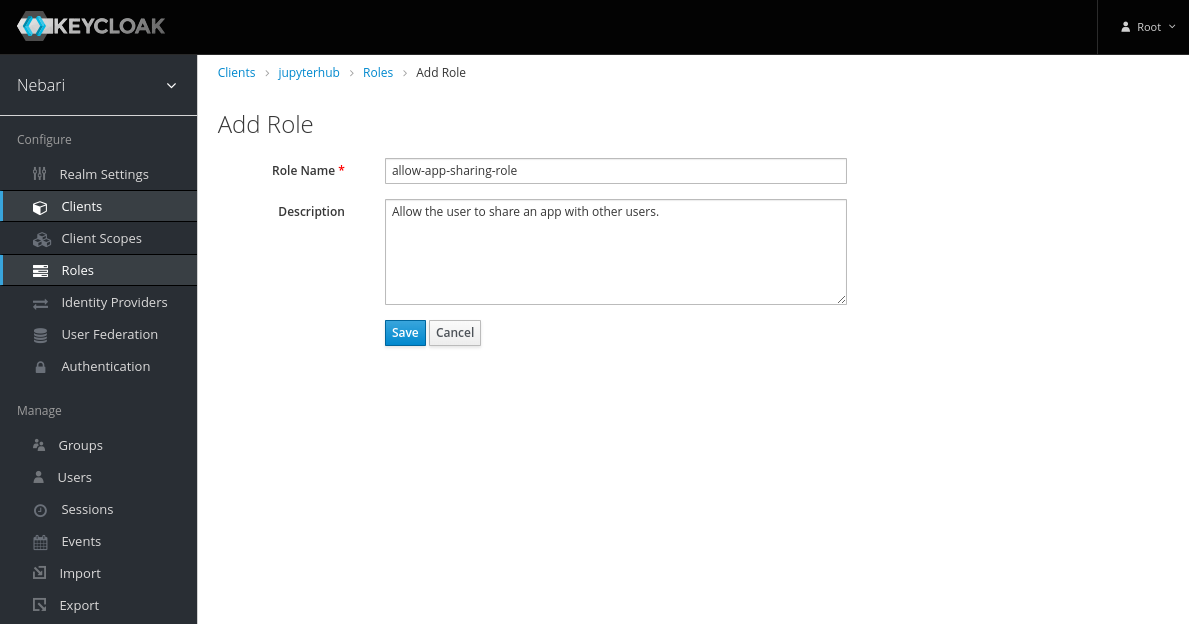
- On the "Add Role" form, write a meaningful name and description for the role. Be sure to include what this role intends to accomplish. Click "Save".
Now the role has been created, but it does nothing. Let's add some permissions to it by clicking on the "Attributes" tab and adding scopes. The following sections will explain the
componentsandscopesin more detail.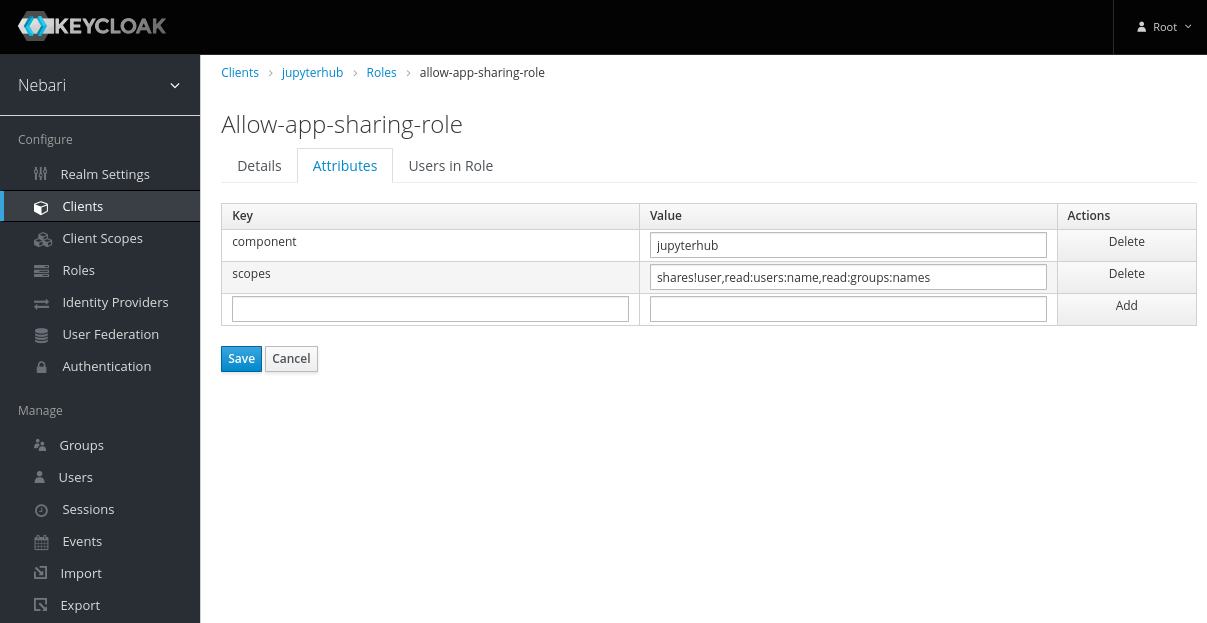
Adding Role to Group(s) / User(s)
Creating a role in Keycloak has no effect on any user or group's permissions. To grant a set of permissions to a user or group, we need to attach the role to the user or group. To add a role to a user:
Select users on the left sidebar and enter the username in the Lookup searchbar.
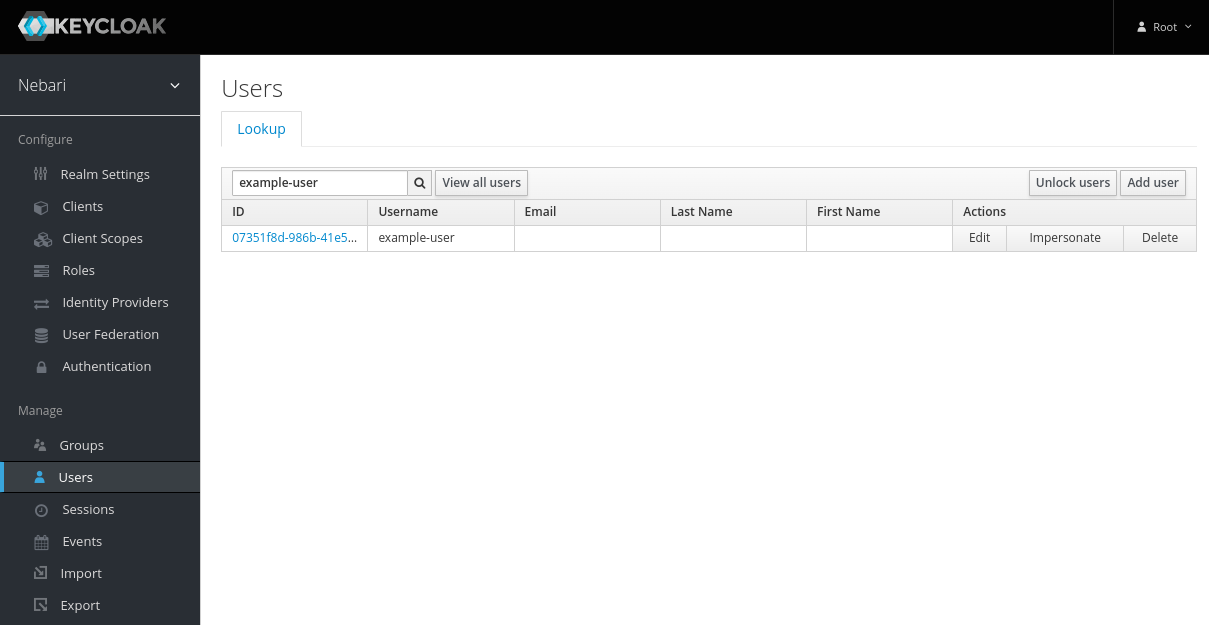
Select that user and click on the "Role Mappings" tab.
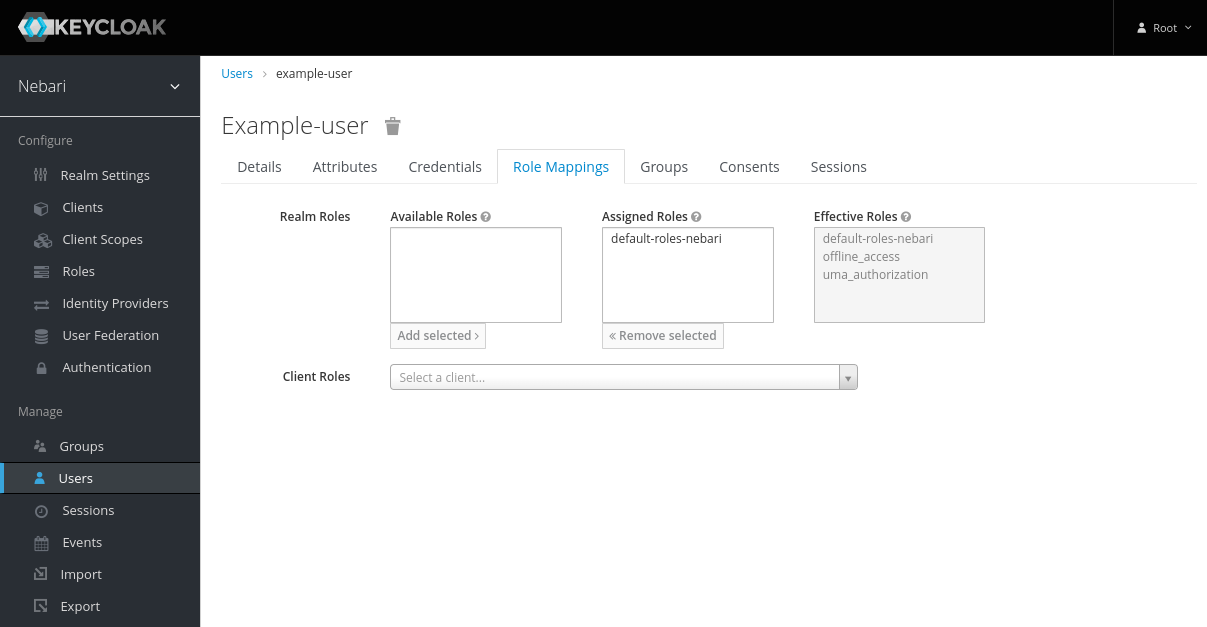
- Select the Client associated with the Role being added.
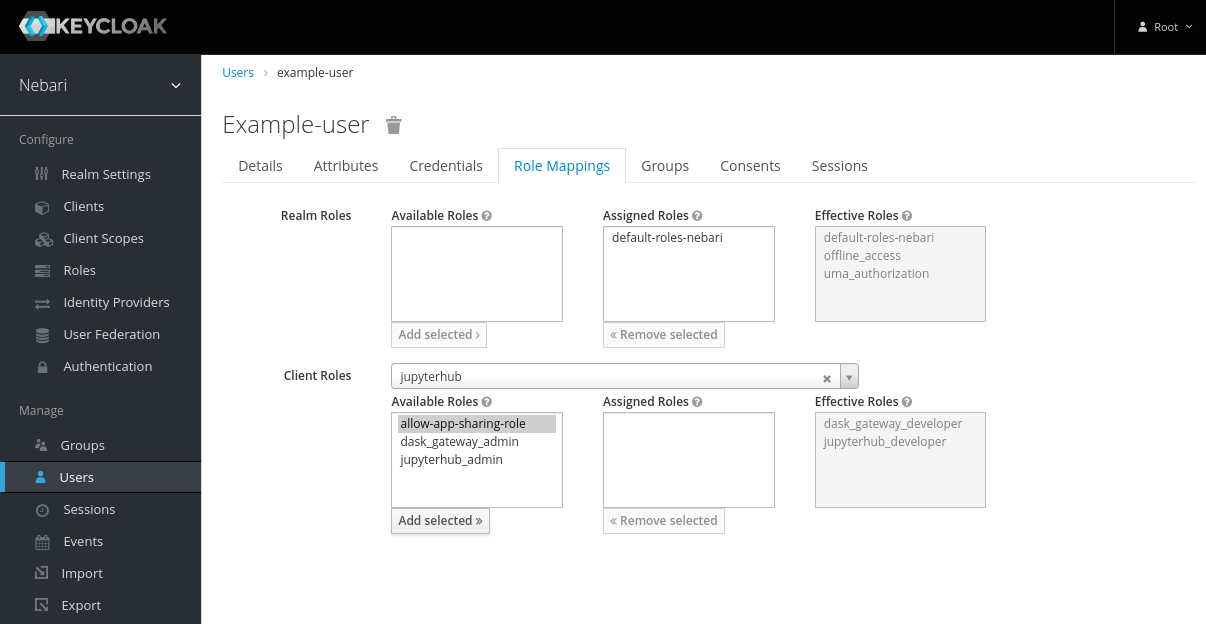
- Select the role in the "Available Roles" and click on "Add Selected >>".
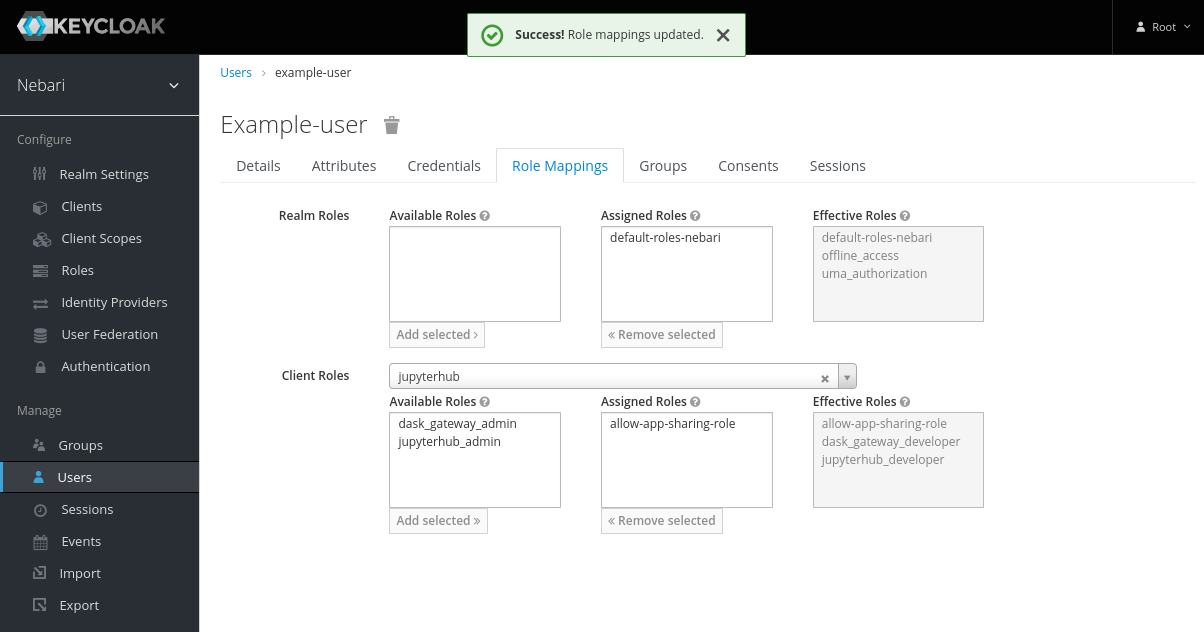
To attach a role to a group, follow the above steps by clicking on the groups tab and selecting a group instead of selecting the user in the first step.
In the above section, we learned how to create a role with some attributes and attach it to a user or a group. Now we will learn how to create scopes to grant a particular set of permissions to the user.
note
After the roles are assigned to a user or group in Keycloak, the user must logout and login back in to the service
for the roles to take in effect. For example let's say we add a set of roles for conda-store to the user named
"John Doe", now for the user "John Doe" to be able to avail newly granted/revoked roles, they need to login to
conda-store again (similarly for jupyterhub as well), after the roles are granted/revoked.
Components Attribute
We have seen in the above example the component attribute while creating a role. The value of this parameter
depends on the type of component in the service, we're creating a role for, currently we only have two components:
jupyterhub: to createjupyterhubnative roles in thejupyterhubclient.conda-store: to createconda-storeroles in theconda_storeclient
JupyterHub Scopes
The syntax for the scopes attribute for a jupyterhub role in Keycloak in Nebari follows the native RBAC scopes syntax
for JupyterHub itself. The documentation can be found here.
As an example, scopes for allowing users to share apps in Nebari's jhub-apps launcher may look like this:
shares!user,read:users:name,read:groups:name
The scopes defined above consists of three scopes:
shares!user: grants permissions to share user's serverread:users:name: grants permissions to read other user's namesread:groups:name: grants permissions to read other groups's names
To be able to share a server to a group or a user you need to be able to read other user's or group's names and must have permissions to be able to share your server, this is what this set of permissions implement.
Conda Store Scopes
The scopes for roles for the conda-store Client are applied to the namespace level of conda-store.
Below is example of granting a user specialized permissions to conda-store:
admin!namespace=analyst,developer!namespace=nebari-git
The scopes defined above consists of two scopes:
admin!namespace=analyst: grantsadminaccess to namespaceanalystdeveloper!namespace=nebari-git: grantsdeveloperaccess to namespacenebari-git
When attached to a user or a group, the above-mentioned permissions will be granted to the user/group.